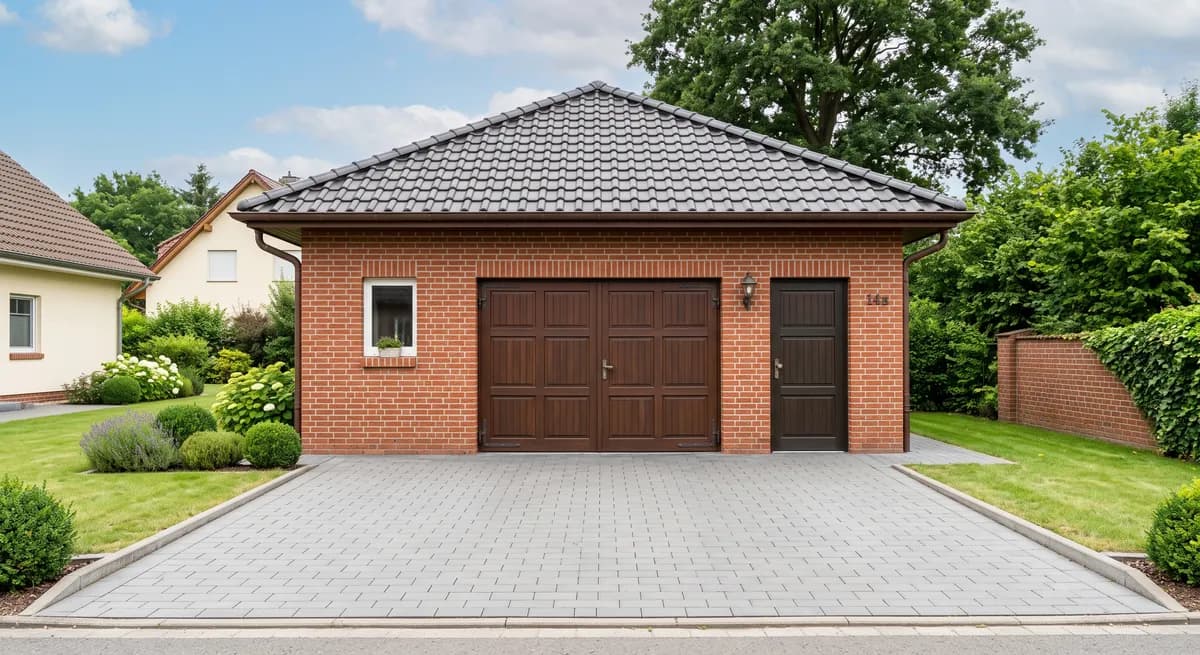
Below you will find a step by step guide to adding a long-term rental listing for a detached garage on Maszbox.pl. How to get the garage ready, measure the entrance, set the price and draw up the agreement is covered in our guide how to get a garage ready to rent out.
Before you start
- Check whether you can rent out the garage on your own. If the garage has several owners, the rental has to be agreed with them. If you rent the garage yourself, for example from the municipality or a housing cooperative, check whether your agreement allows subletting. On a housing estate, the estate rules also apply.
- Get the garage ready and measure the entrance. Check the width and height of the door opening and the interior dimensions. A table of what to measure and why is in our guide how to get a garage ready to rent out.
- Energy performance certificate. Detached buildings with a usable floor area under 50 m² are among those exempt from the obligation to have one, so a typical detached garage does not need it. For a larger heated garage, check whether the obligation applies to you.
How to add the listing step by step
Step 1. Sign in or create an account
Sign in to your account or create a new one if you do not have it yet. Then click the “Add listing” button.
Step 2. Fill in the location
Enter the exact location:
- city,
- street,
- building number,
- district (if it was not filled in automatically).
Step 3. Enter the listing title
By default the form creates the title automatically from the category, city and street. To write your own, untick “Create the listing title automatically”. Write a short title with the garage type and location, for example: Detached brick garage with electricity - Lublin, Czuby.
Step 4. Fill in the listing description
You can use this template and fill in the fields in brackets:
Detached garage for long-term rent on [street] street in [city], [name] district.
- [brick / metal] garage, [up-and-over / sectional / automatic] door
- door opening: [width] × [height] m, interior: [length] × [width] × [height] m
- [electricity / lighting / power socket], [dry / heated]
- access road: [paved / wide / narrow], area [fenced / unfenced]
- for parking a car [and storing things], no fire-hazardous materials (spare fuel in canisters, gas cylinders)
- available from: [date]
Describe only what is true. If the garage is not monitored, do not say it is.
Step 5. Add photos
Add photos of the garage. The maximum size of one photo after compression is 5 MB. Allowed file formats:
- jpeg,
- png,
- webp.
Take the photos in daylight with the door open. Other people's number plates should not be visible in the photos. You will find the full list of shots in our guide how to get a garage ready to rent out.
Step 6. Pick the listing type
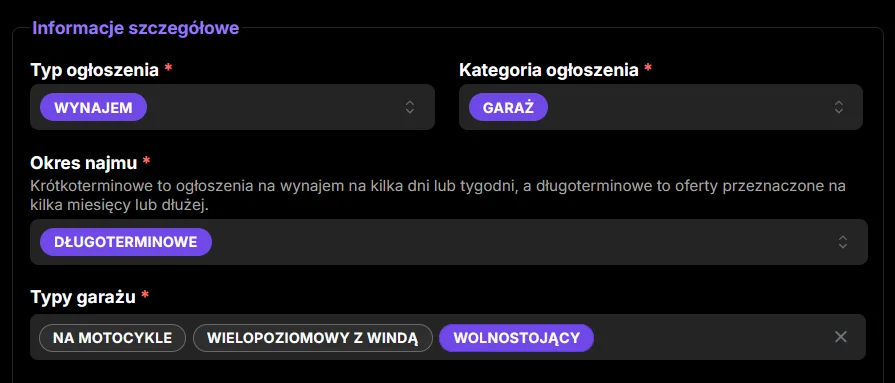
Pick the listing type: Rent.
Step 7. Pick the listing category
Pick the category: Garage.
Step 8. Pick the rental period and the garage type
Pick the rental period: Long-term. For a long-term rental you do not set a minimum number of rental days.
Pick the garage type: Detached.
Step 9. Pick the garage condition
Set the condition of the garage, for example Finished or Needs renovation.
Step 10. Pick the access
Pick how the garage is accessed, for example 24/7 access. If the estate rules or the way the keys are handed over limit the hours, pick the option that matches reality.
Step 11. Tick the extra options
Tick the security and usage options that are really available.
Step 12. Enter the price
Enter the gross price for one month of rent. Gross means the full amount the tenant will pay, with no hidden extra charges. If you take a deposit or the tenant pays for electricity separately, say so in the listing description. You can check the rates of similar garages in your area in the garages for rent listings.
Step 13. Accept the consents and declarations
Read and accept the required consents and declarations.
Step 14. Add the listing
Once all the details are filled in, click the button to add the listing. Your listing will appear on Maszbox.pl. You can find the general rules for adding listings on the how to add a listing page.
After adding the listing
You sign the agreement directly with the tenant. Maszbox.pl is a listings service and is not a party to that agreement. What to include in the agreement and the garage handover report, and how to settle the tax on rental income, is covered in our guide how to get a garage ready to rent out. If you rent out as a business to a private person online, consumer rights rules also apply to you.

Marsel Zychowski
MaszBox Team
We share practical know-how on renting and selling space - garages, warehouses, storage units, parking spots and more.